I'm so glad you're here! I want nothing more than to inspire and encourage you to create a home & style you love & deserve!
Welcome!
free resources
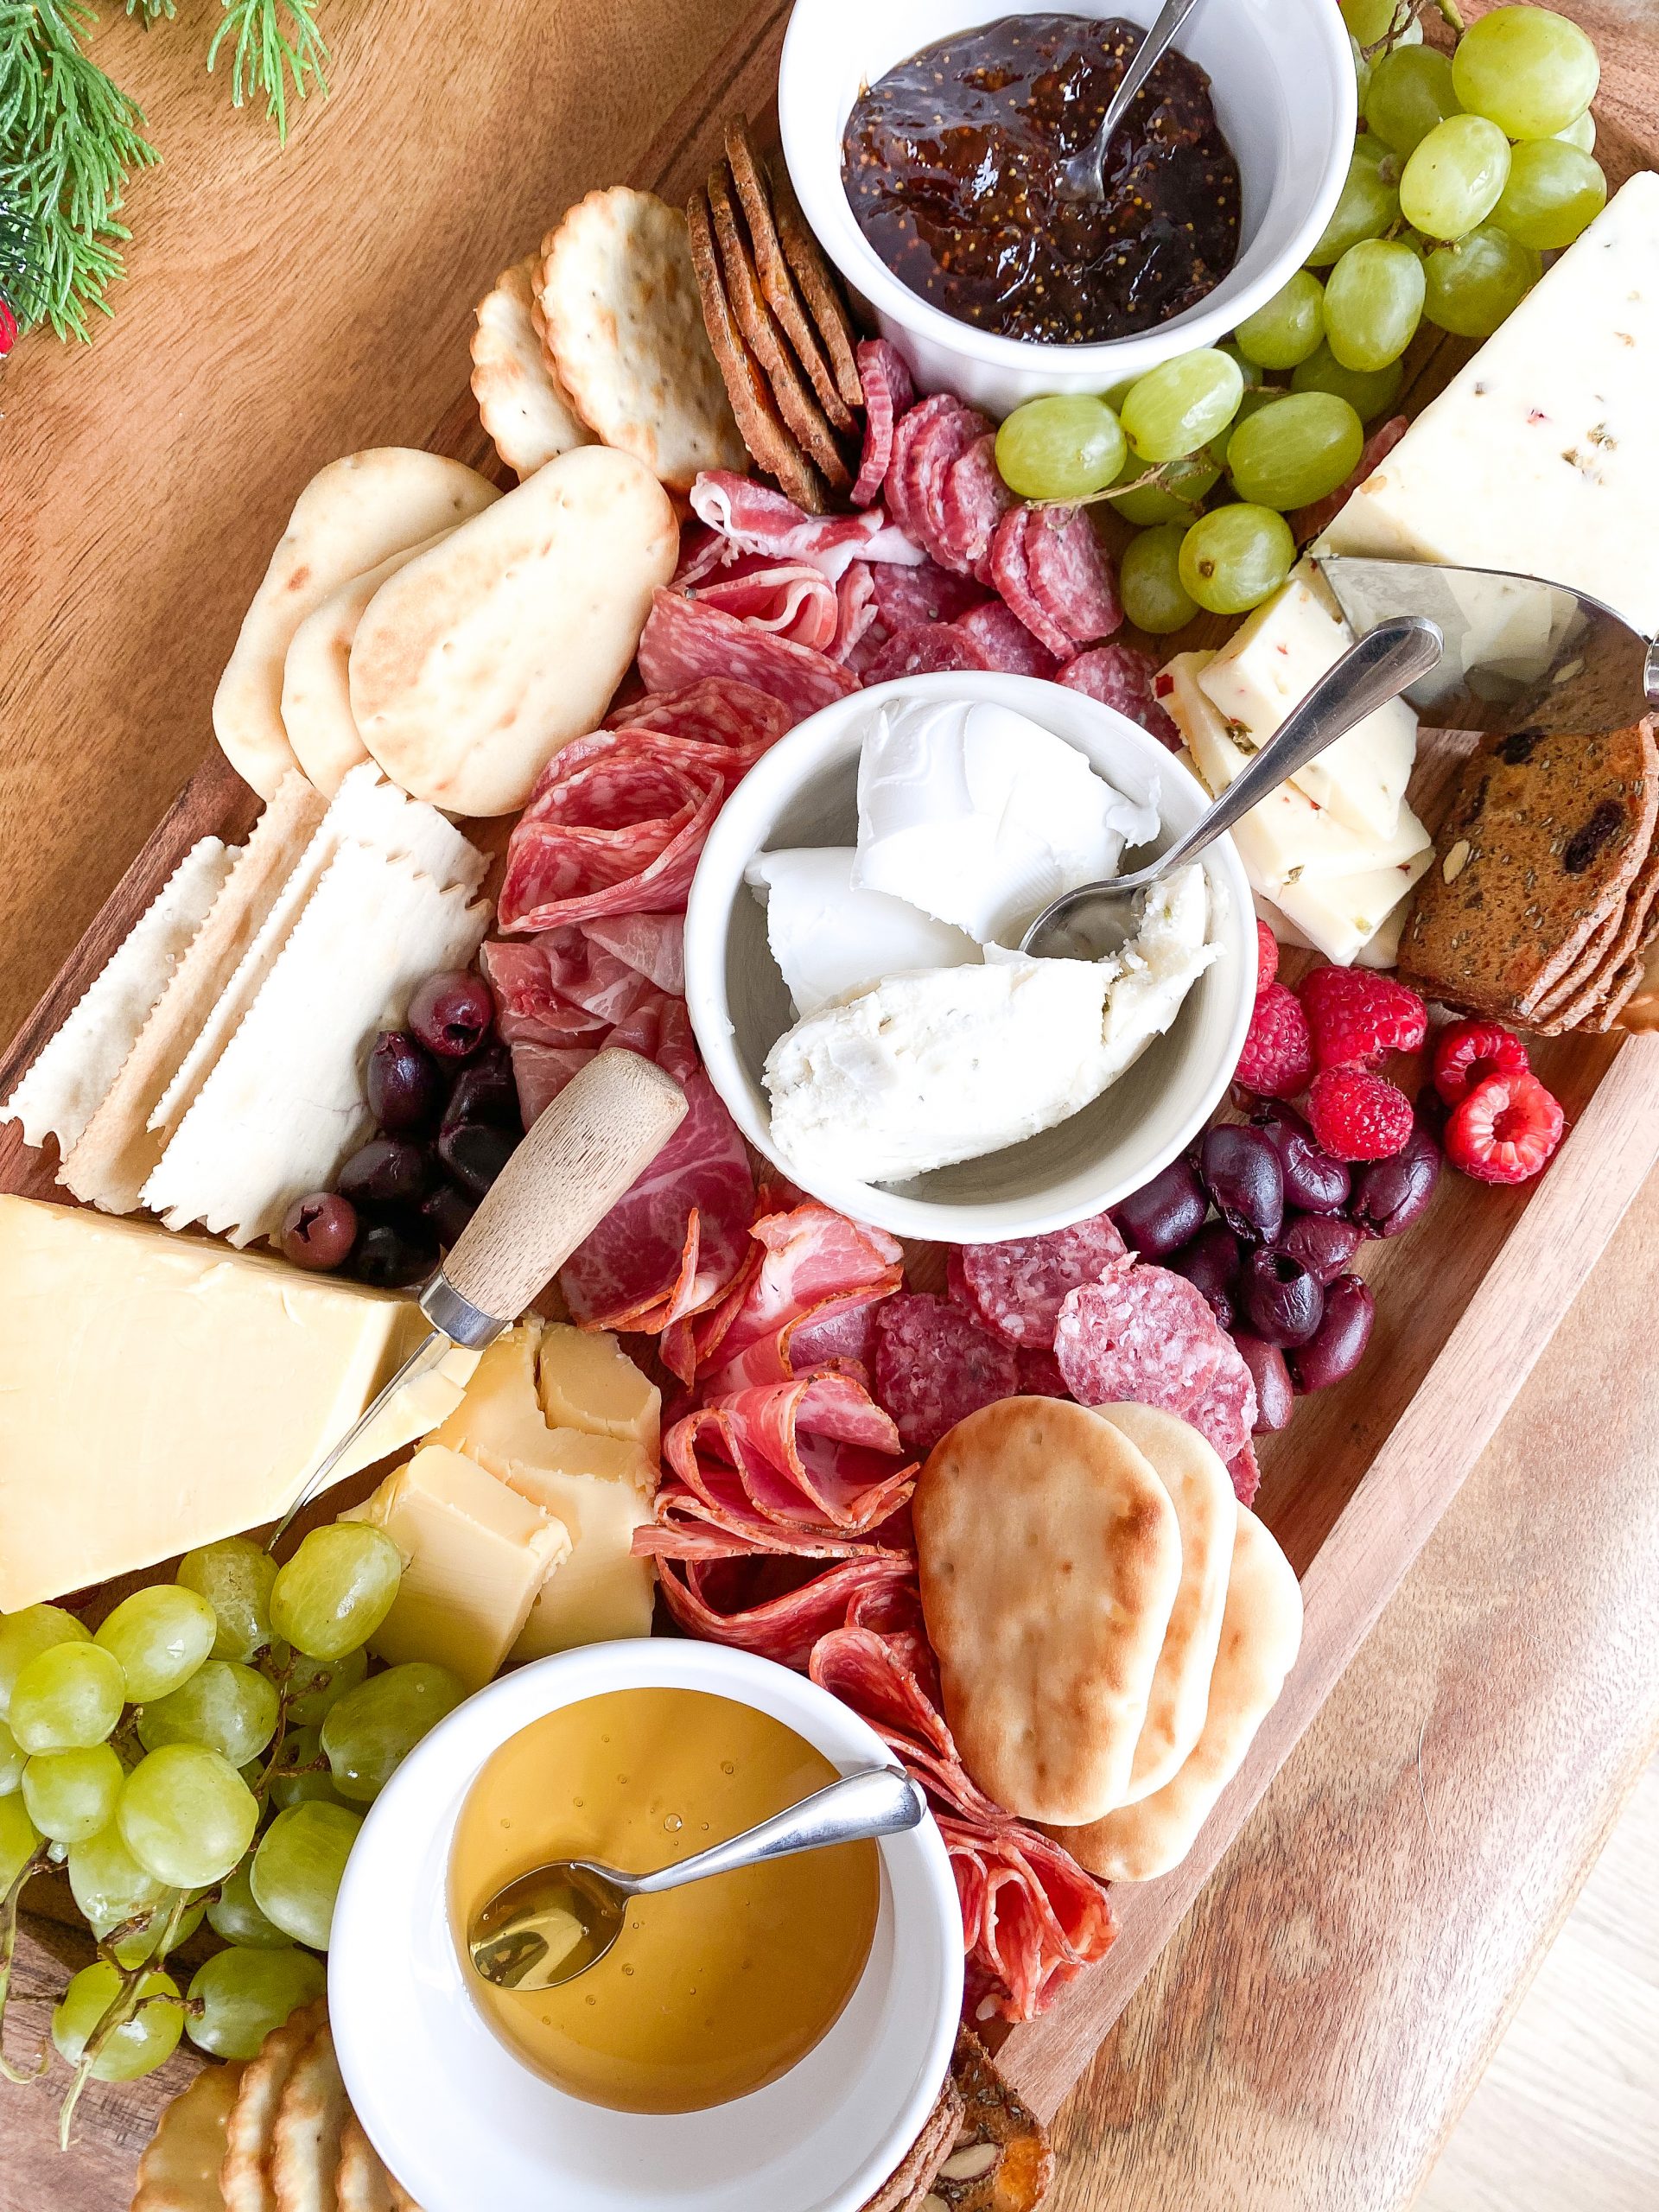
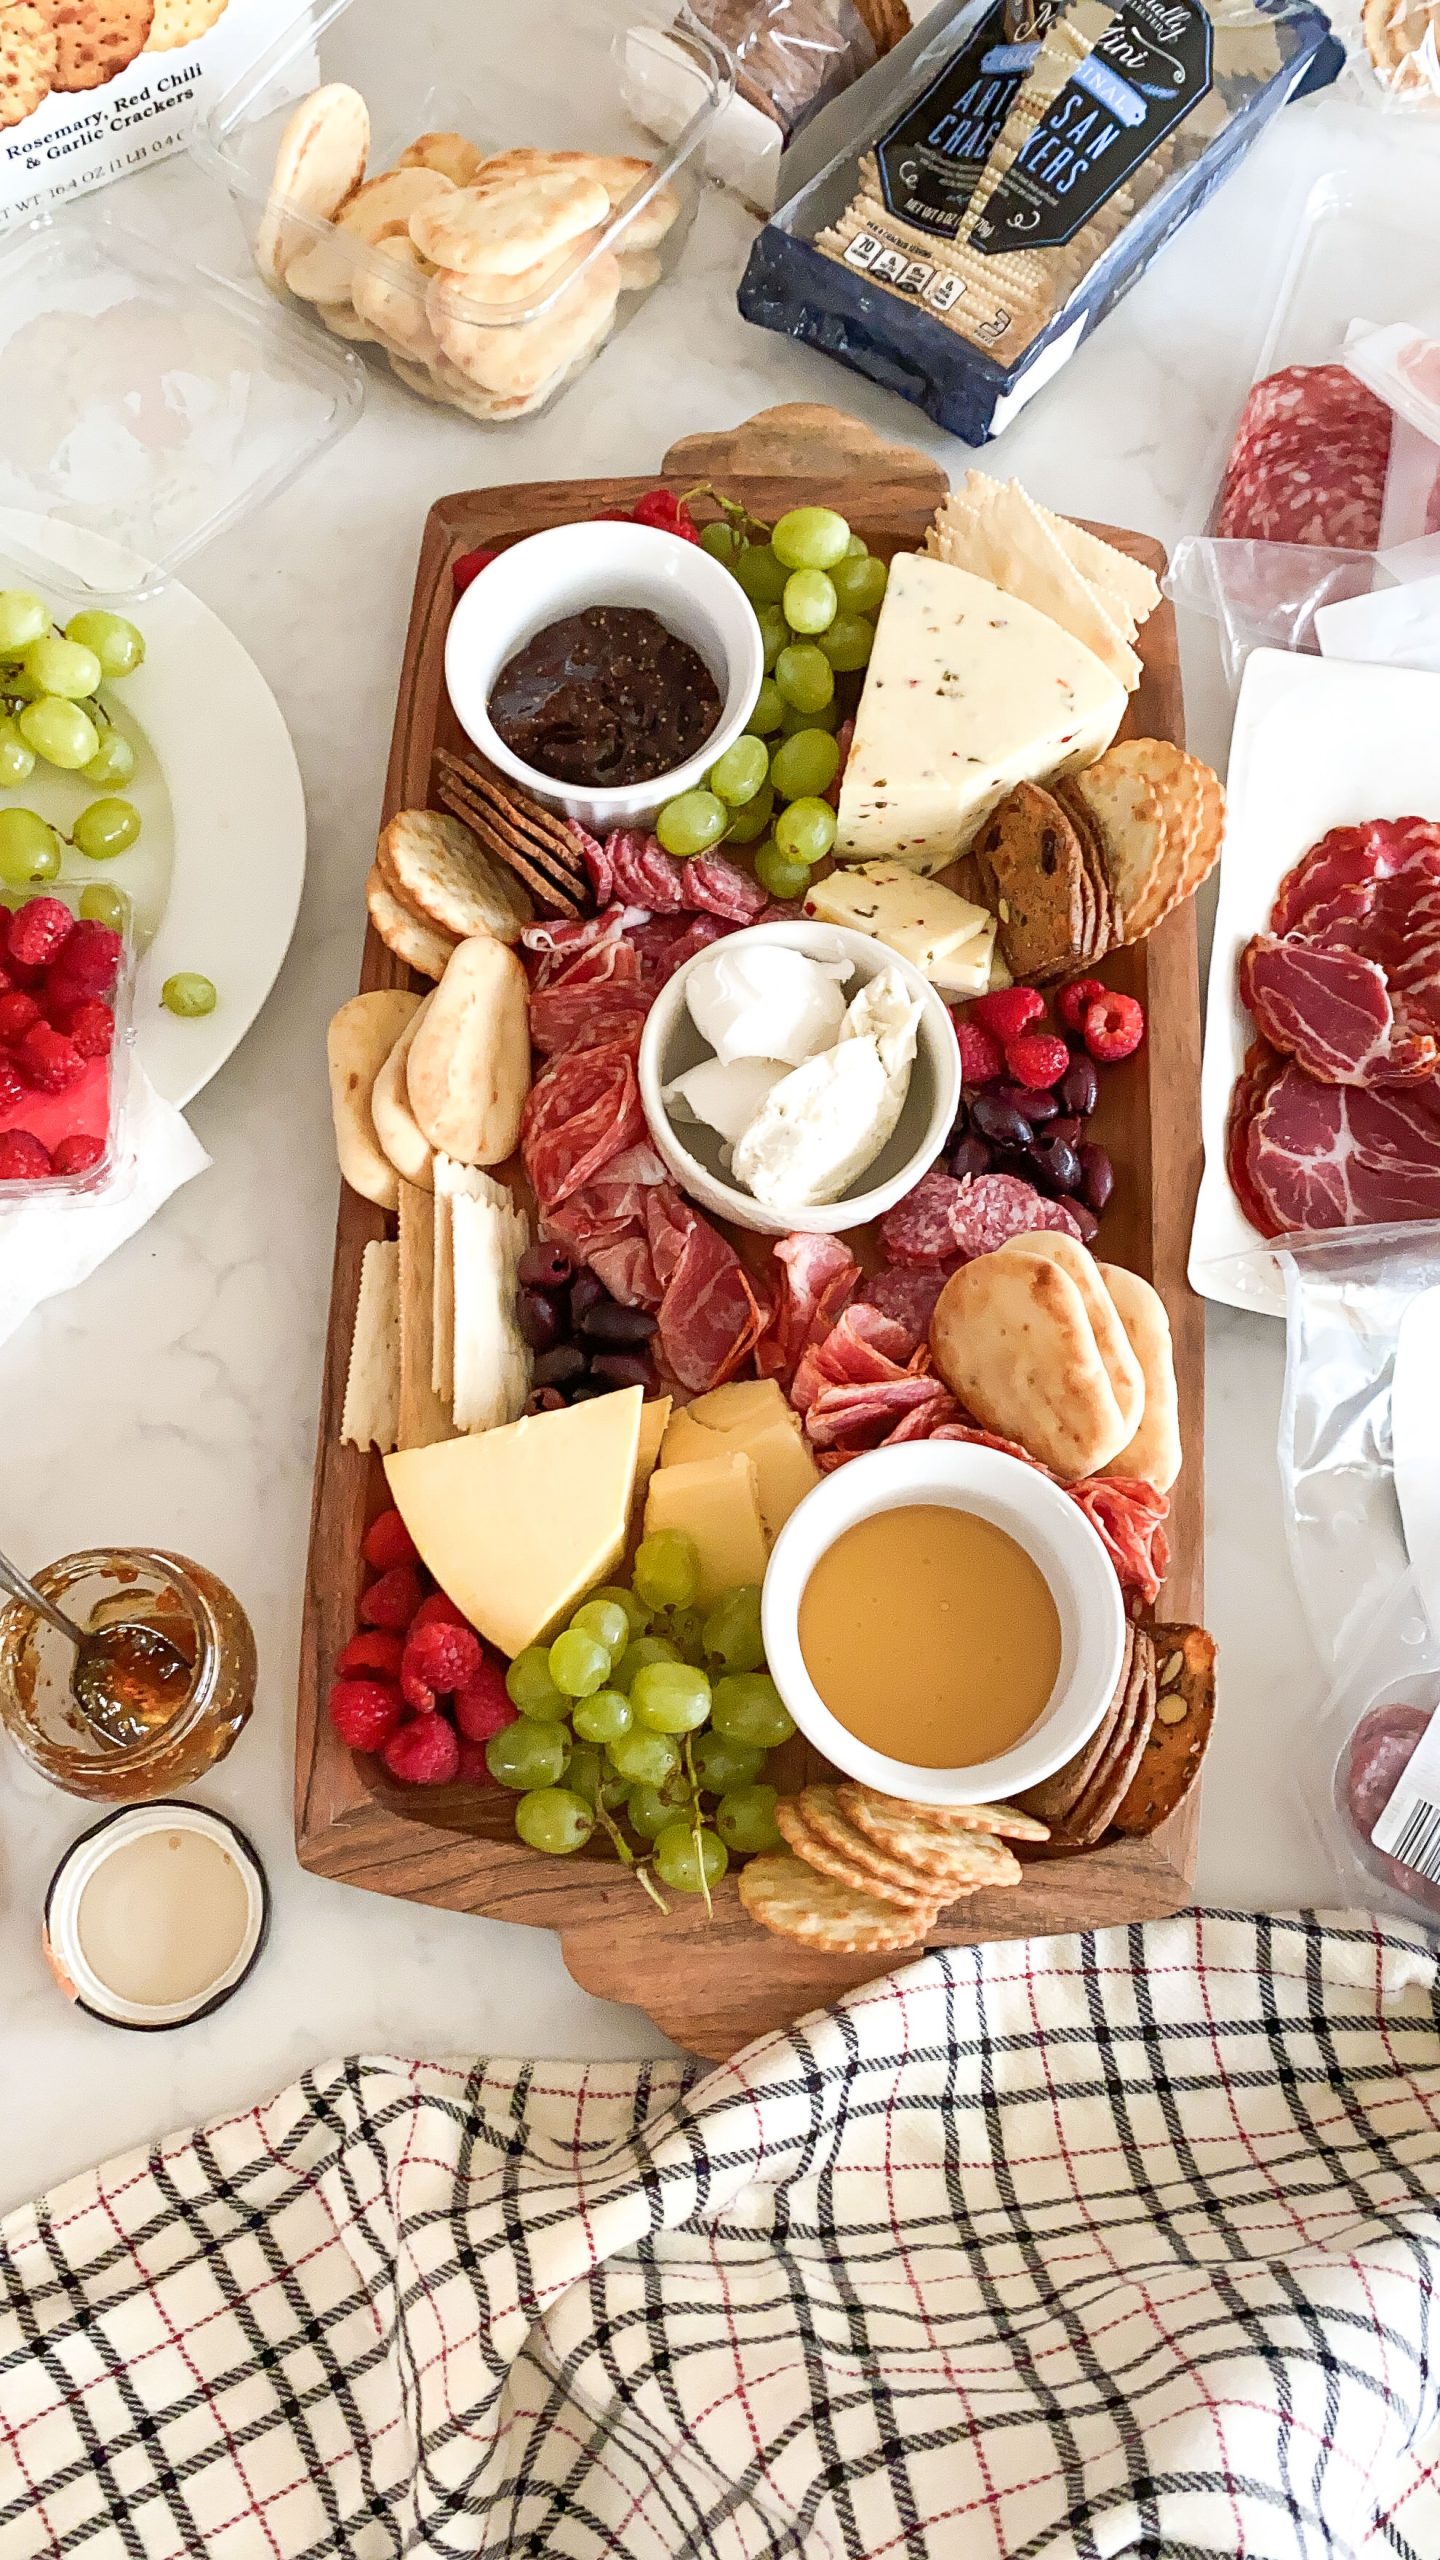
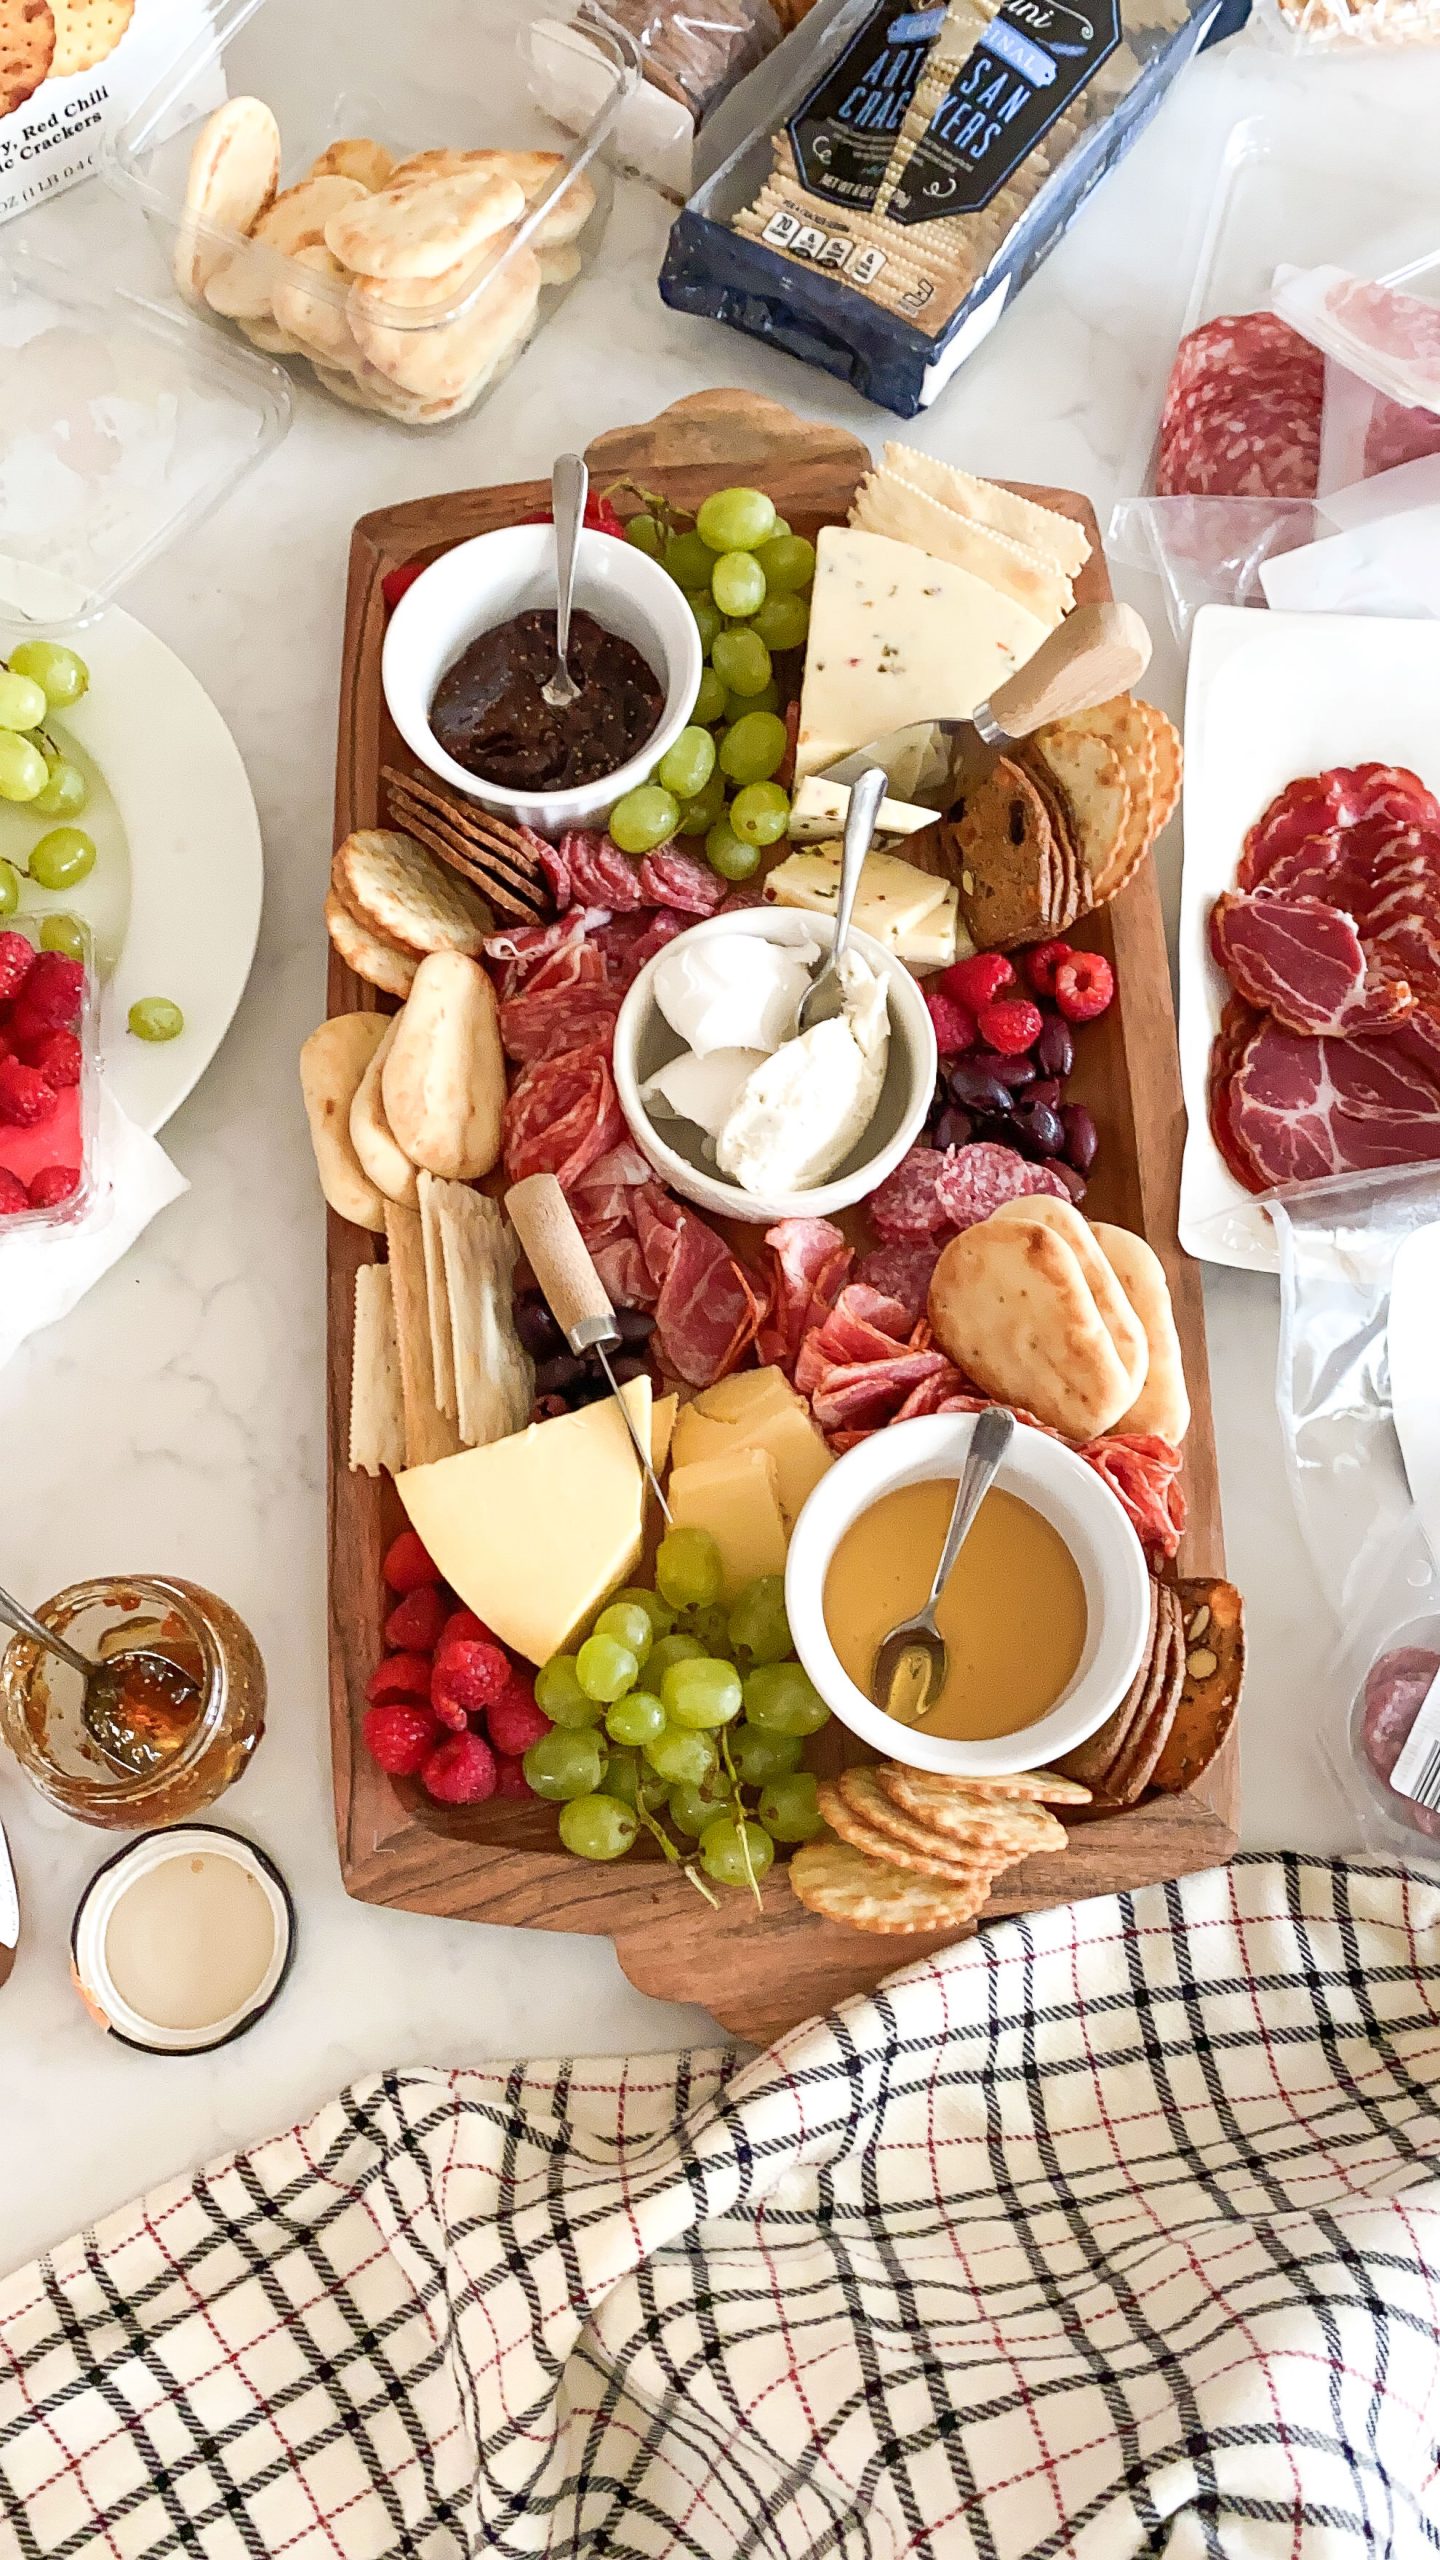
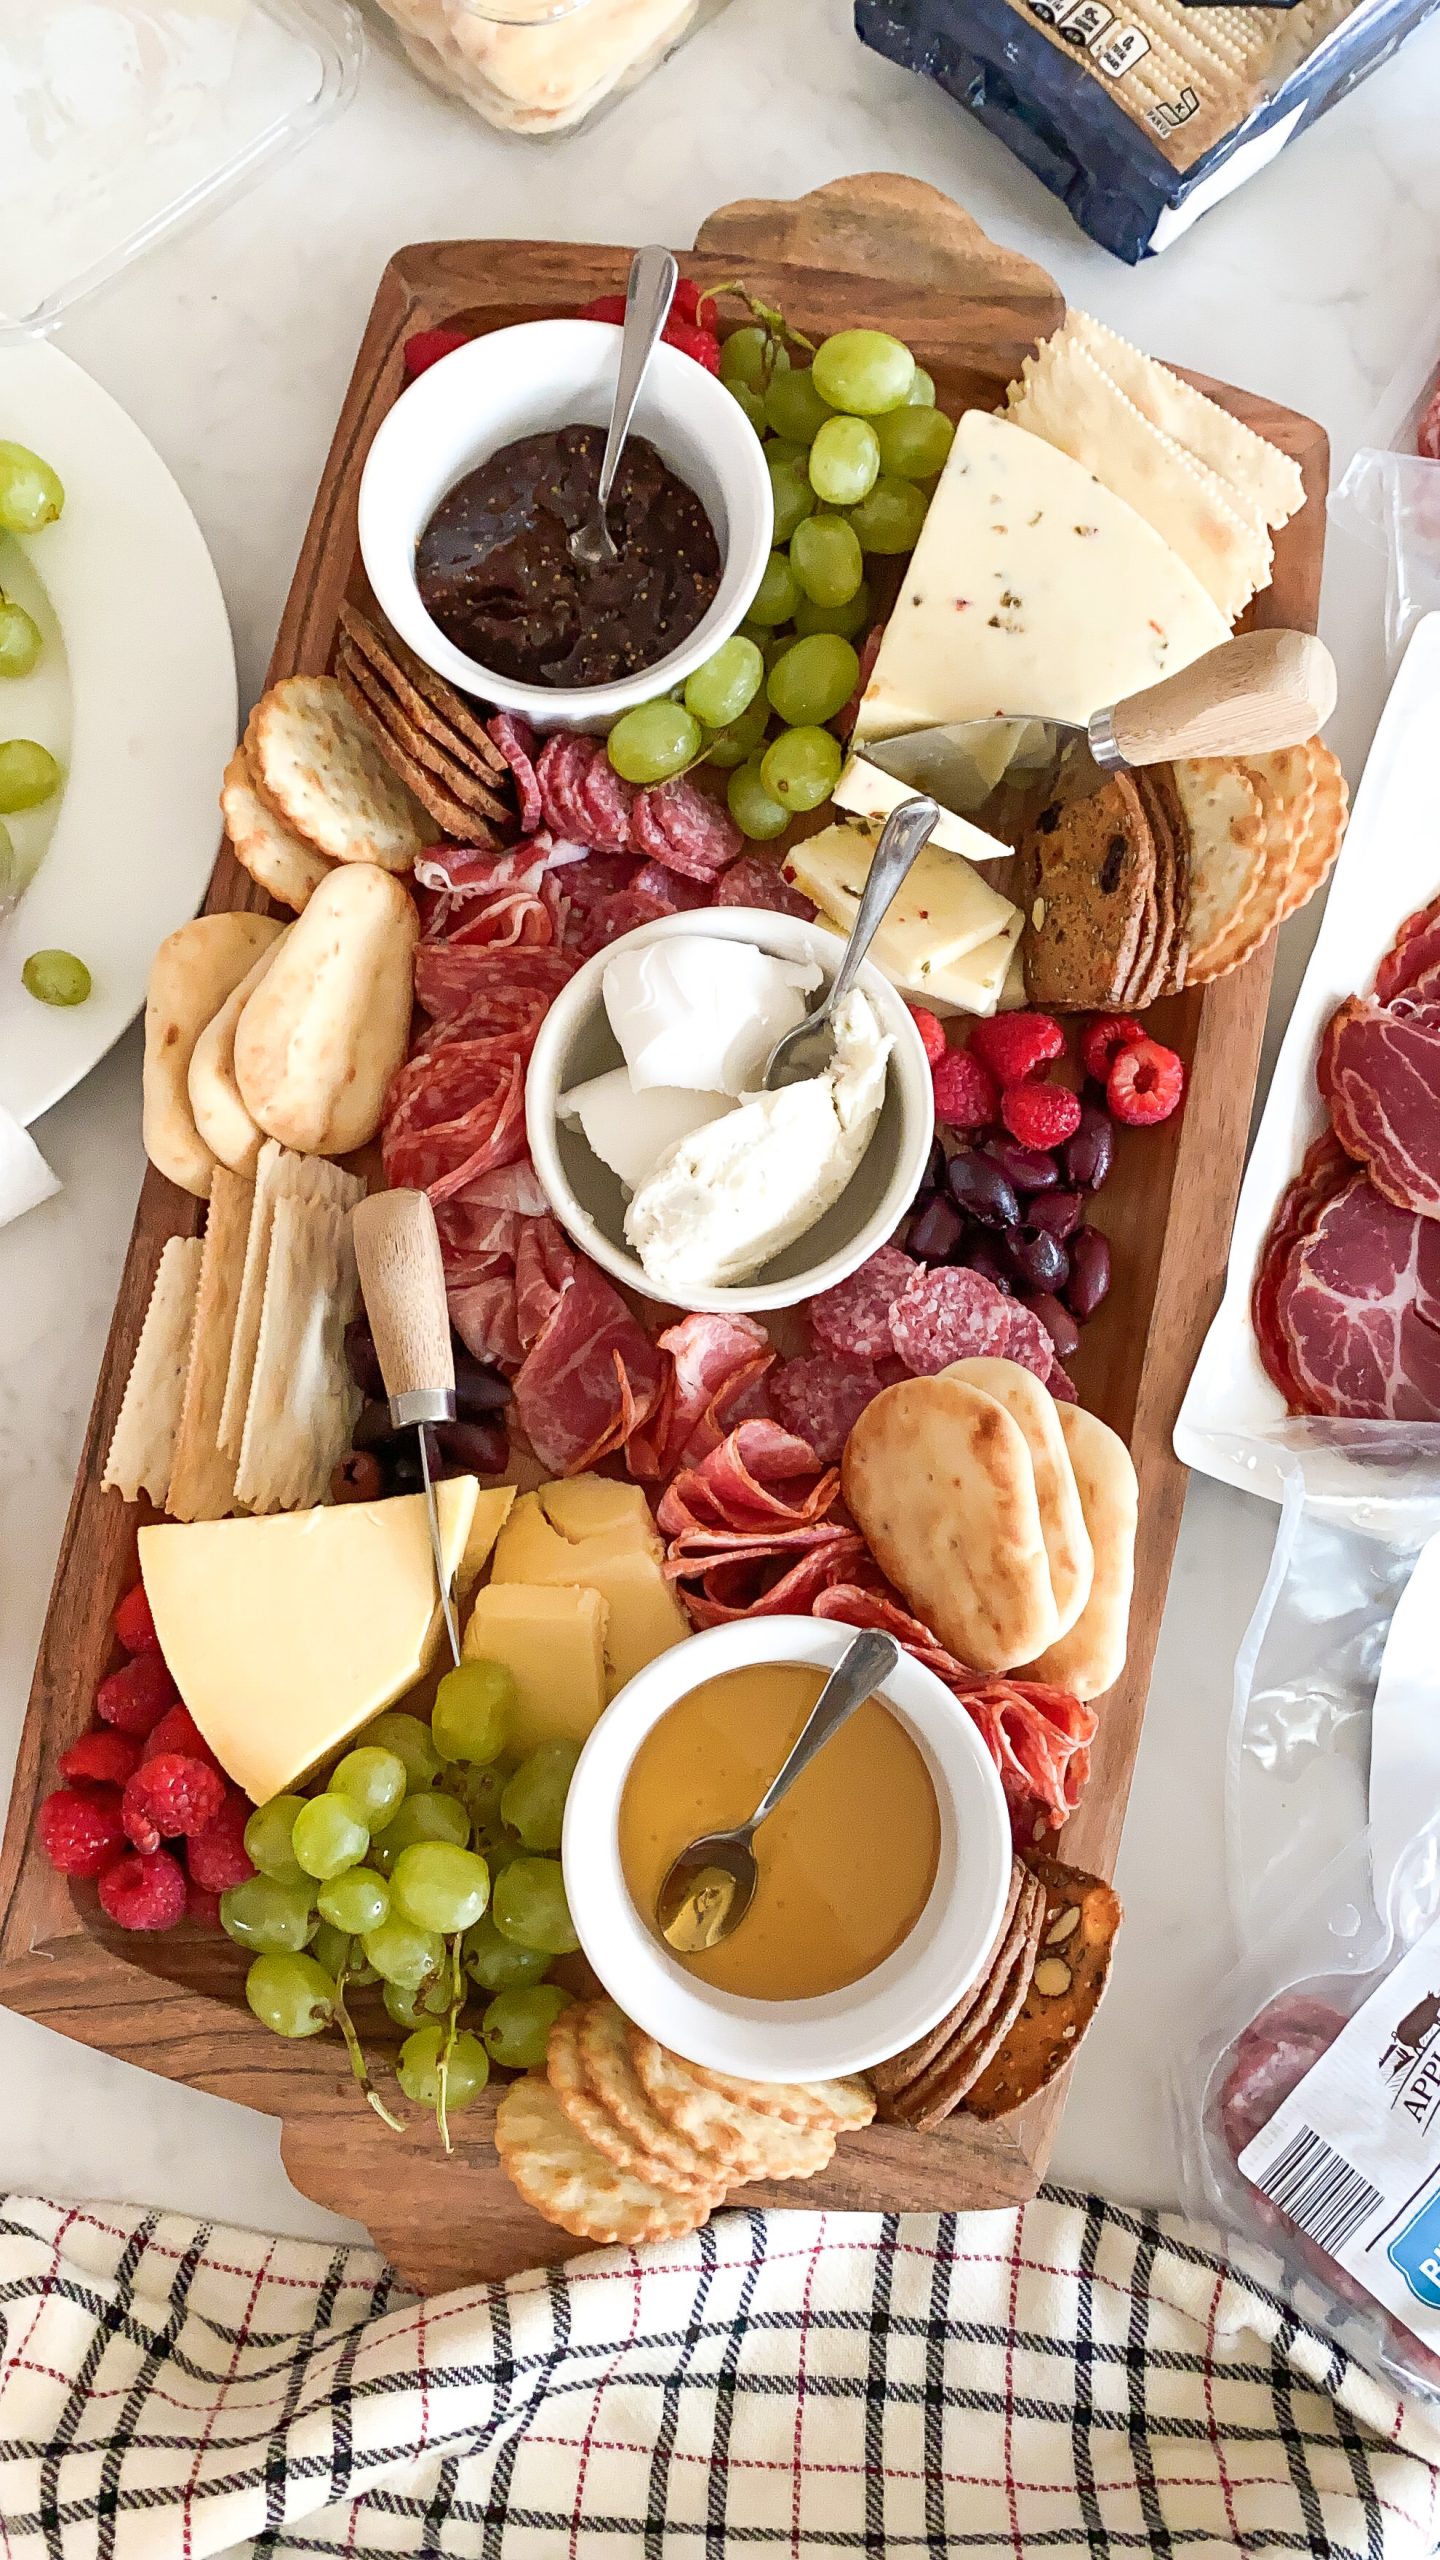
It’s no secret that charcuterie boards are trending…and delicious!! Building a charcuterie board for other people can be intimidating sometimes, so I’ve created steps for you to make your very own Pinterest-worthy charcuterie board!
STEP ONE
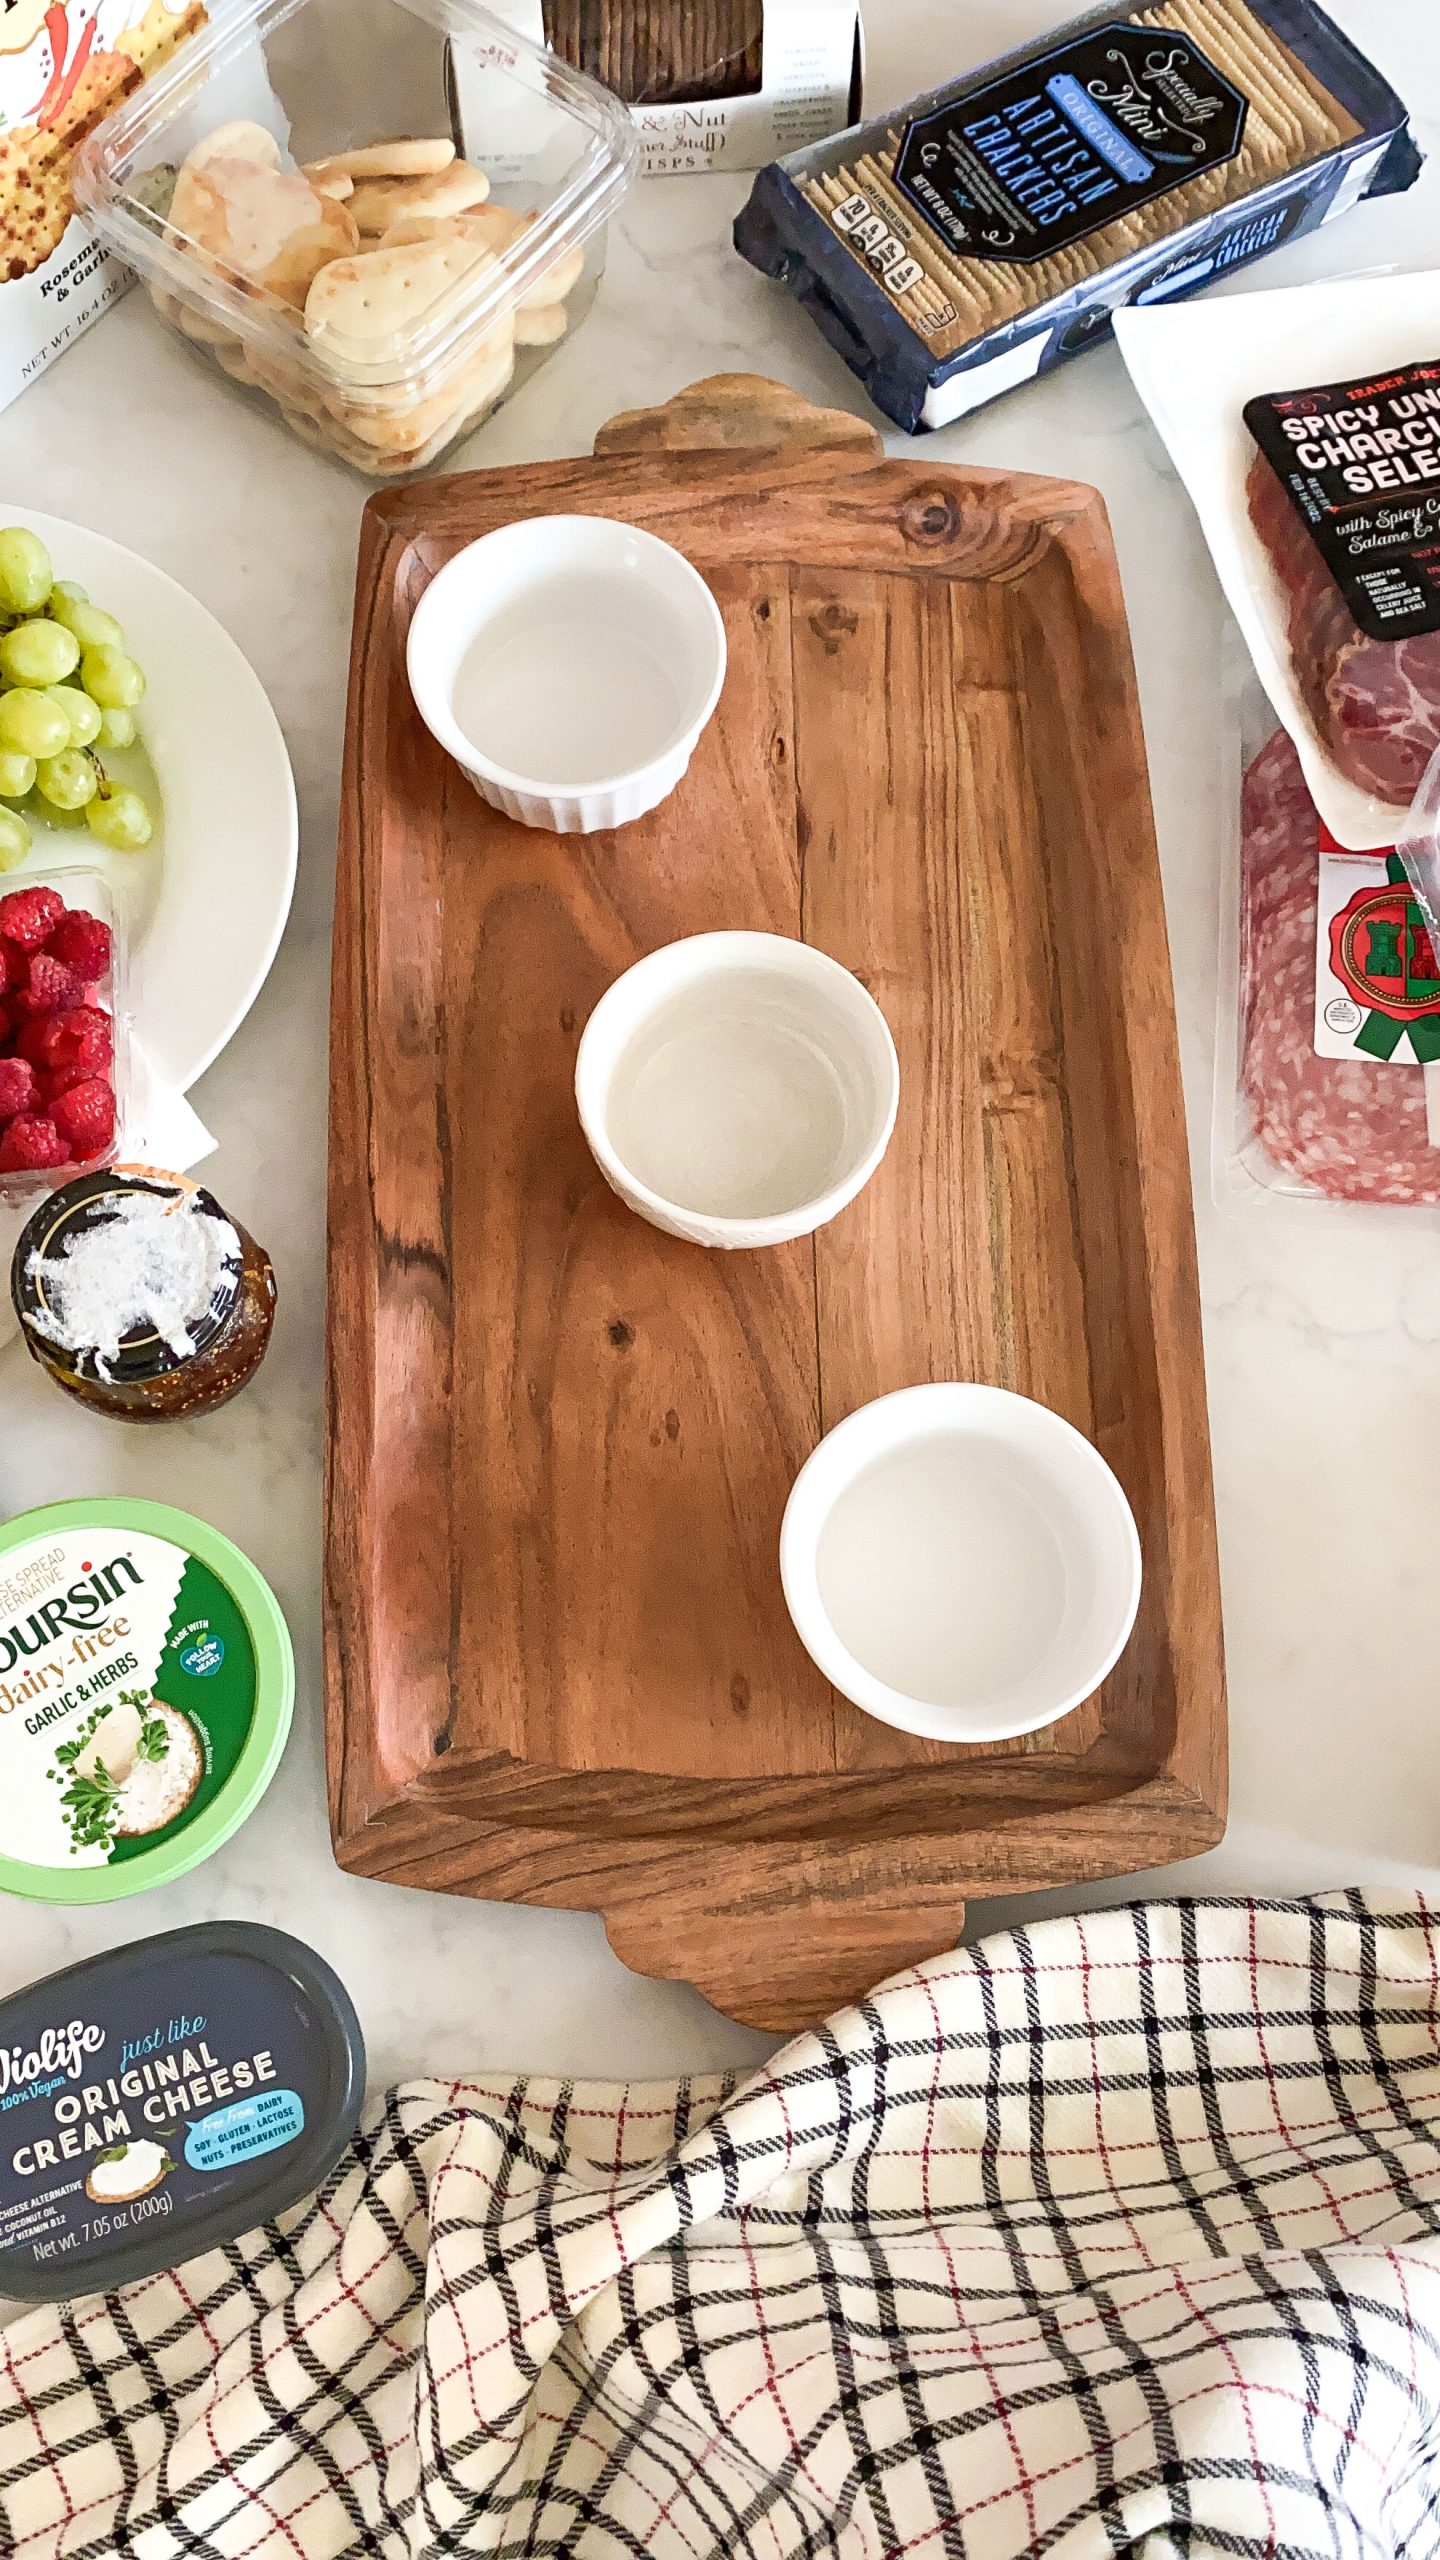
The first step is picking out your base, this is where you will put all of the snacks! Your base can be a large cutting board, tray, platter, or even just a plate – whatever you choose or have around the house! Also, plan ahead for if any of your food needs to be put in a ramekin (honey for example) and place those on your base first to make sure you have room in the end. Here are a few of my favorite boards and trays that work great for a charcuterie base!
STEP TWO
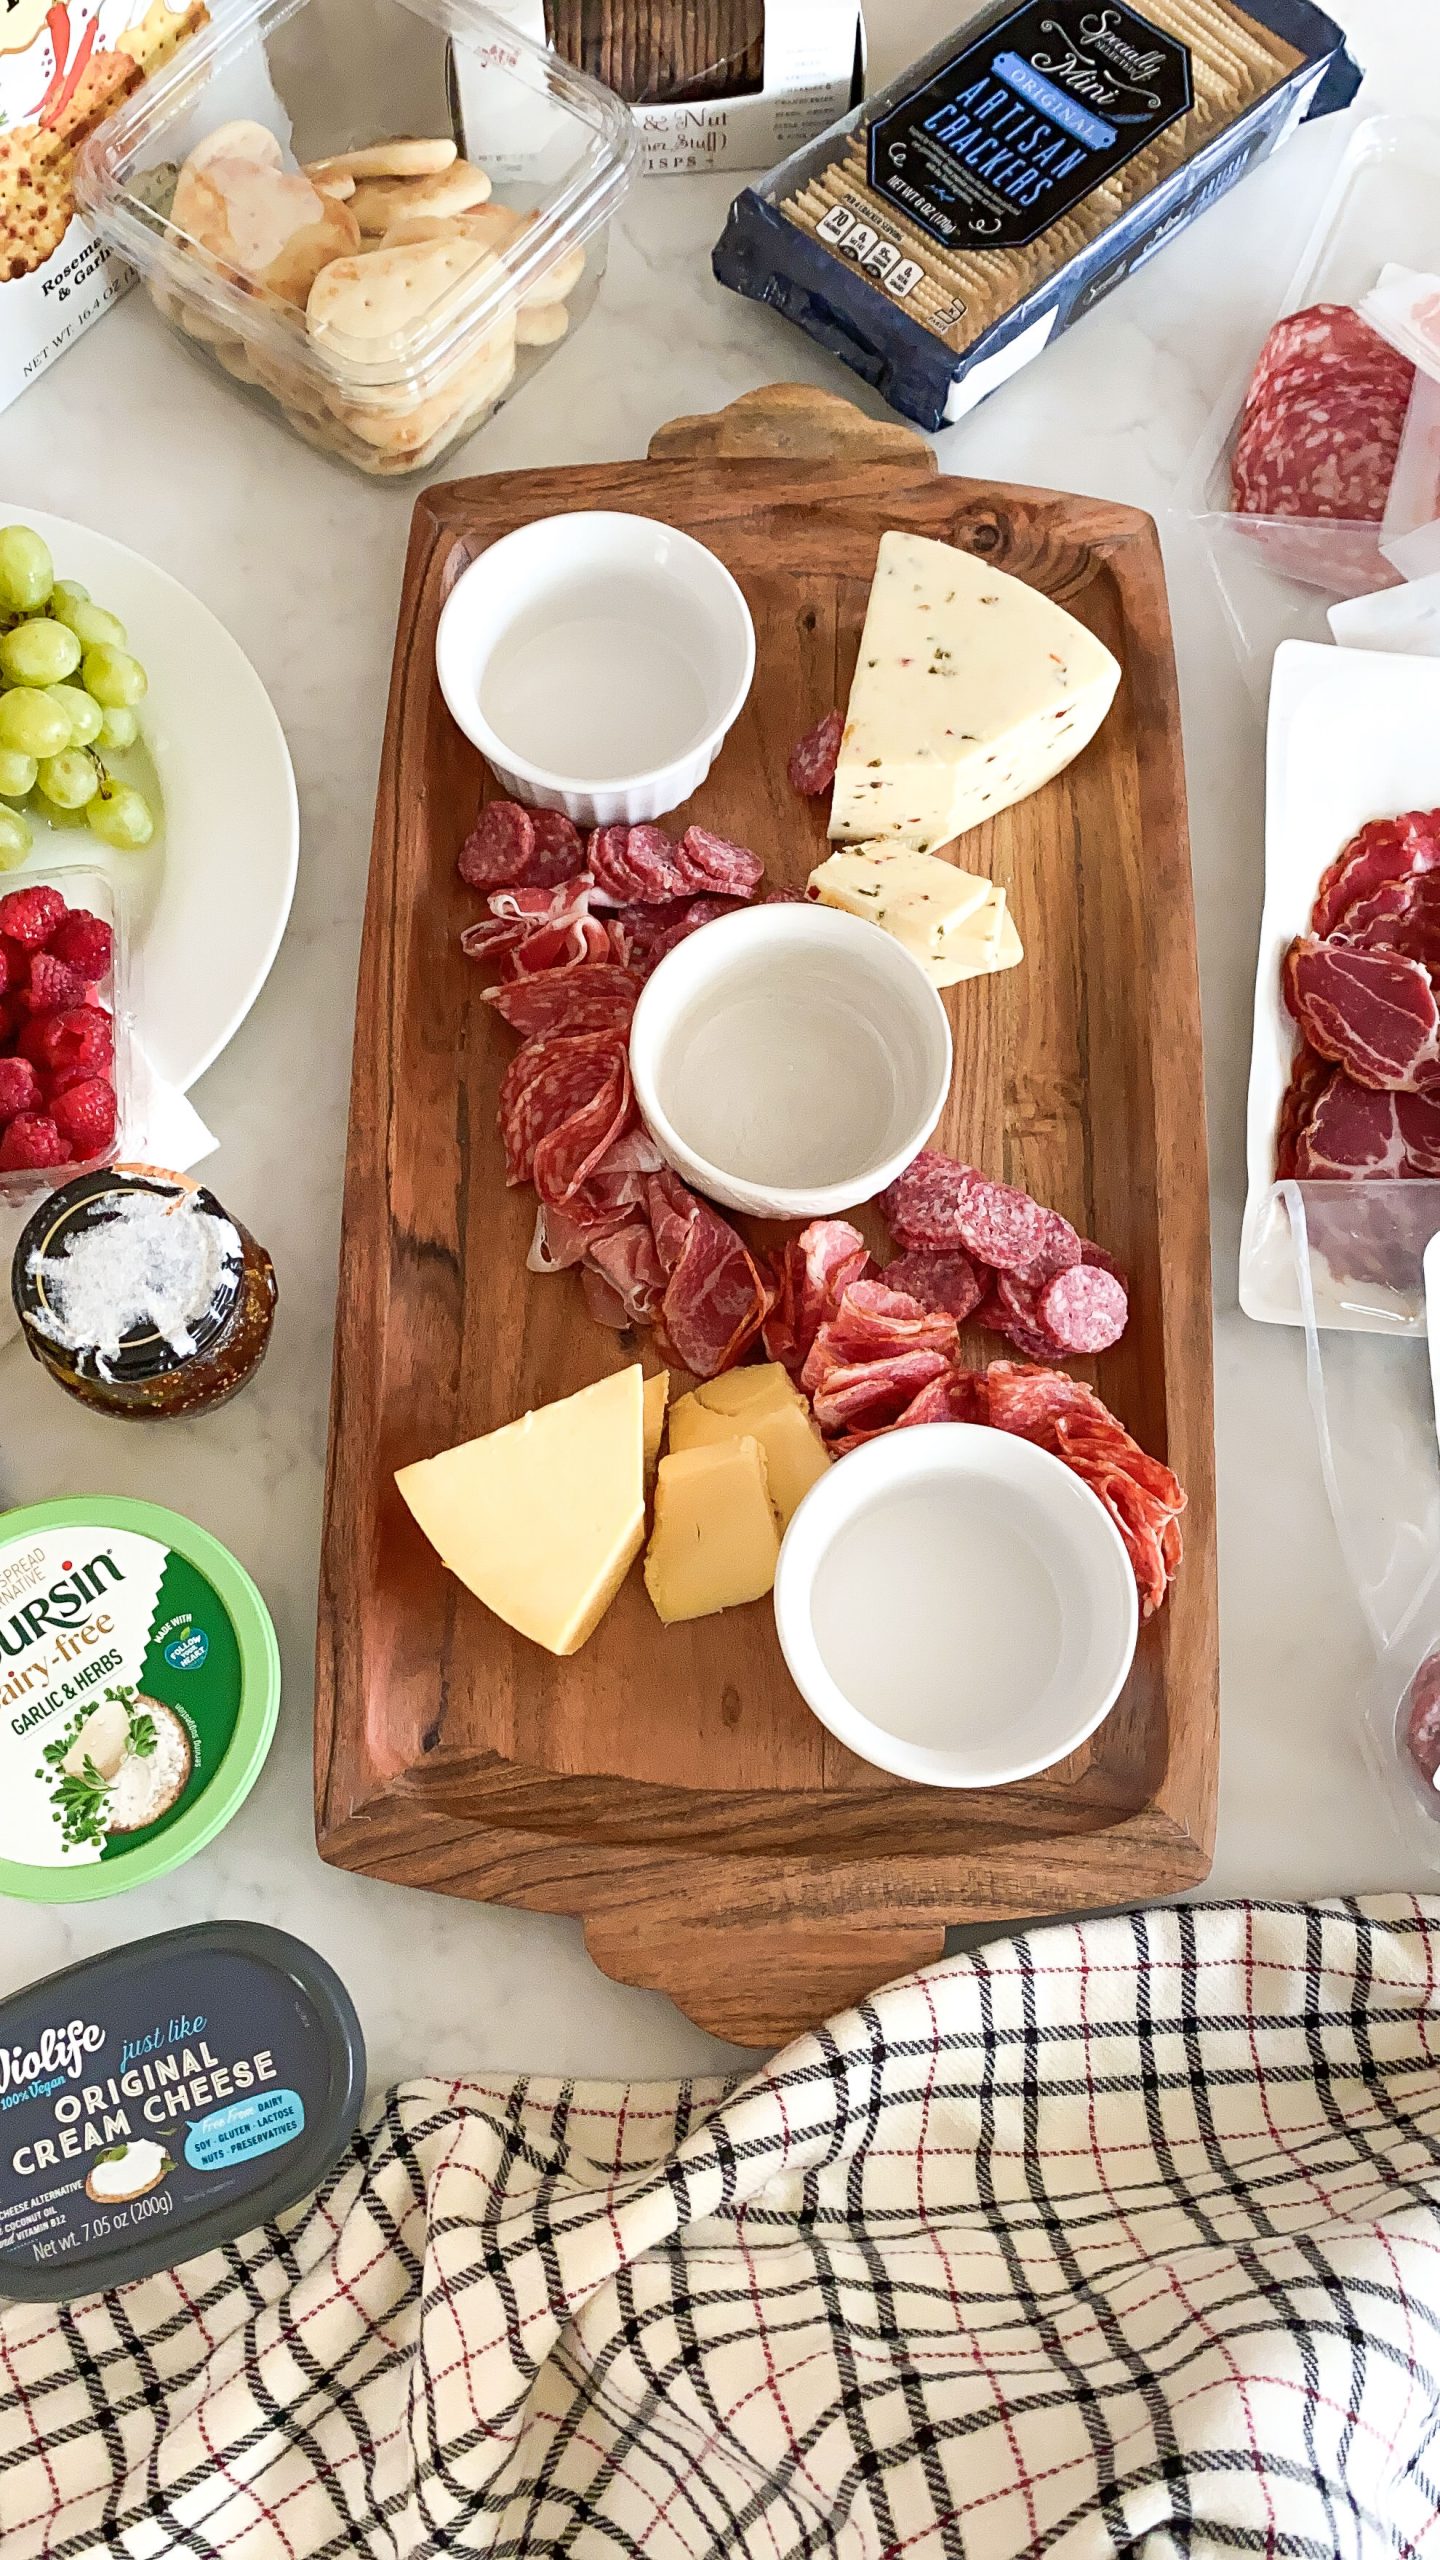
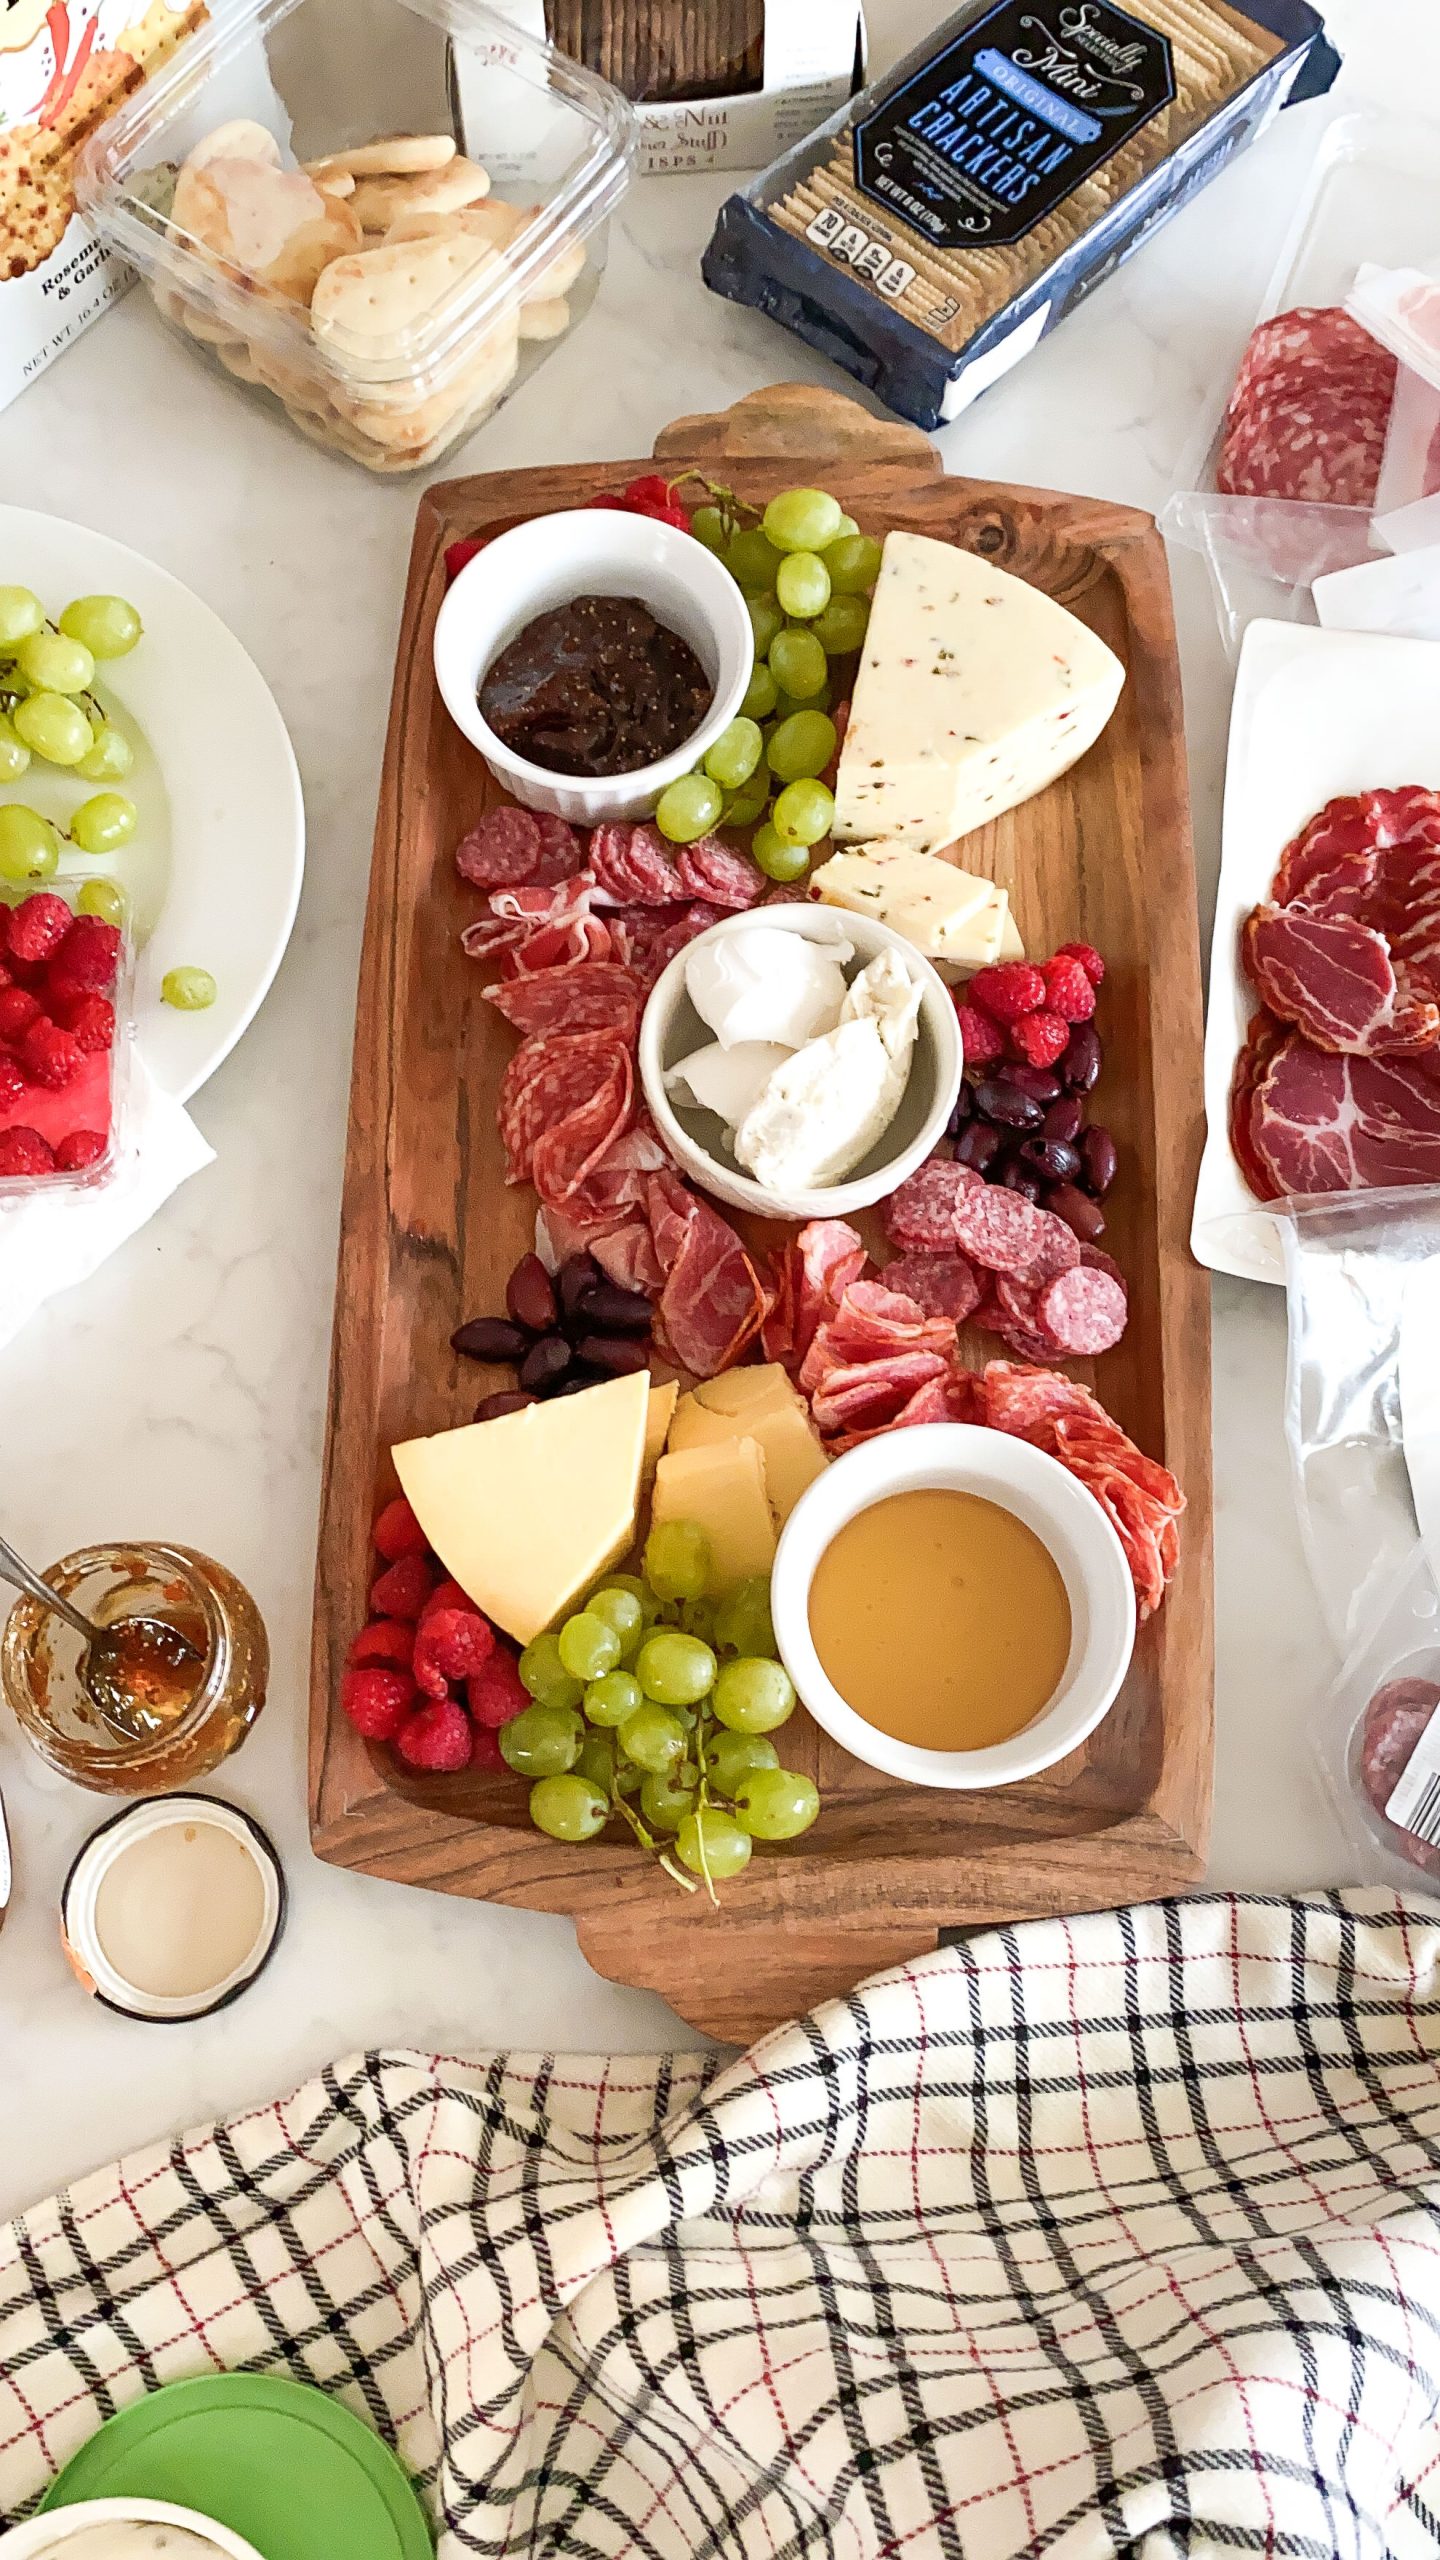
The second step is to lay out your meat and cheeses, these will go on the platter first since they take up the most space. Place your larger blocks of cheese symmetrically apart from each other on the base, then fold or lay out your meats in between. My favorite deli meats and cheeses are usually meats like hard salami, prosciutto and pepperoni, and for cheeses I like to mix soft and hard cheese like brie, sharp white cheddar, goat cheese and smoked gouda. These days I have to mix in some dairy free cheese alternatives, so I like to place those in a small ramekin in the middle of the board.
STEP THREE
The next step is adding in the extra foods that enhance the meat and cheese, like fruit, honey, preserves, olives, nuts, etc. You can start to fill in the gaps on your base with these items and use the small ramekins you placed on the board from step one.
STEP FOUR
The fourth step is adding crackers and or bread! Gimme all the carbs! I love so many different kinds of crackers and each one goes well with different types of meat and cheeses. Mixing up textures and flavor profiles (savory/sweet and hard/soft) will also help enhance more flavor for the meat and cheese!
STEP FIVE
The last step is tools! Add in your cheese knives, spoons and/or honey dippers, and any other kind of tool you will need to create each bite. Here are some of my favorite tools to elevate your board!
If you’re hosting or building a charcuterie board for a holiday party this year and find this post helpful be sure to take a picture and tag me on Instagram so I can see and share!


Comments +